Explore instructional guides and insights to elevate your AXIR Wallet journey.
How to Sell?
Selling tokens on AXIR Wallet offers users a convenient and efficient way to liquidate their digital assets into fiat currency or other cryptocurrencies. This process is essential for several reasons:
1
Liquidity: Selling tokens allows users to convert their digital assets into cash or other cryptocurrencies, providing liquidity and flexibility in managing their investment portfolio.
2
Profit-taking: Selling tokens enables users to realize profits from their investments by selling tokens at a favorable price point. This feature empowers users to capitalize on market movements and optimize their investment strategies.
3
Diversification: Selling tokens allows users to diversify their investment portfolio by reallocating funds into different assets or investment opportunities. This flexibility helps users manage risk and maximize returns in a dynamic market environment.
4
Access to Funds: Selling tokens provides users with access to funds for various purposes, such as covering expenses, making purchases, or reinvesting in other assets. This access to liquidity enhances financial flexibility and empowers users to meet their financial goals.
Overall, selling tokens on AXIR Wallet is a critical feature that enables users to unlock the value of their digital assets, optimize their investment strategies, and navigate the cryptocurrency market with confidence.
How can I sell?
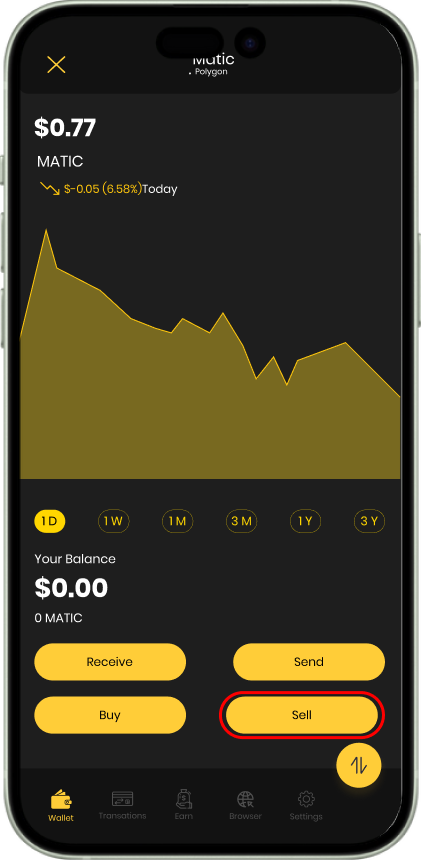
To sell your assets, log in to our AXIR Wallet app. On the dashboard navigate to AXR token. On this screen, you will see many menu, including “Sell” as shown in the screen below.
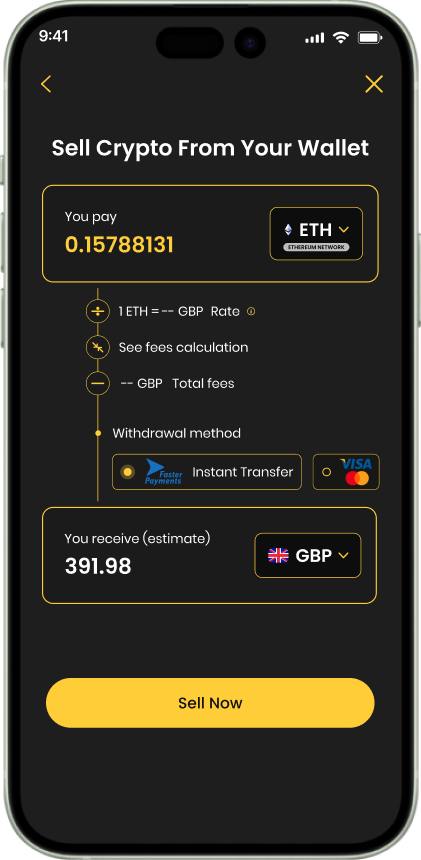
Click on Sell button, the screen that will appear below will show you details like how much you will have to sell your Asset and how much you will earn. Click on the “Sell Now” button in the bottom of the screen.
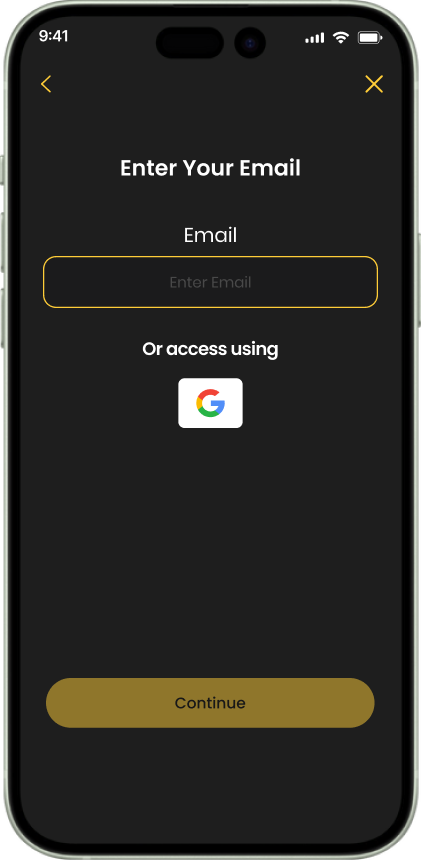
After you tap the “Sell Now” the next screen will to enter the email id. Below screen is for enter the email id where we will send you the verification code
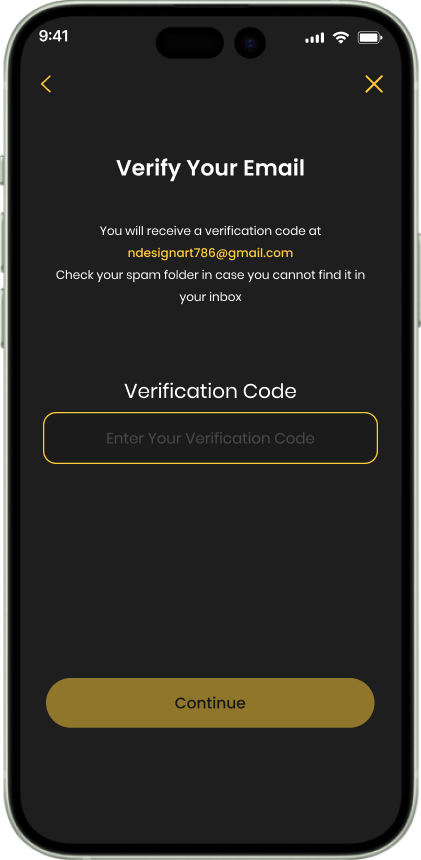
After you have entered your valid email id, and tap “Continue” a verification code will be sent to your entered email id. In the below next screen you are supposed to enter the verification code.
After you have entered the verification code, tap “Continue”.
After you have entered the valid verification code and tap Continue button, the next below screen is to enter your Personal Details.
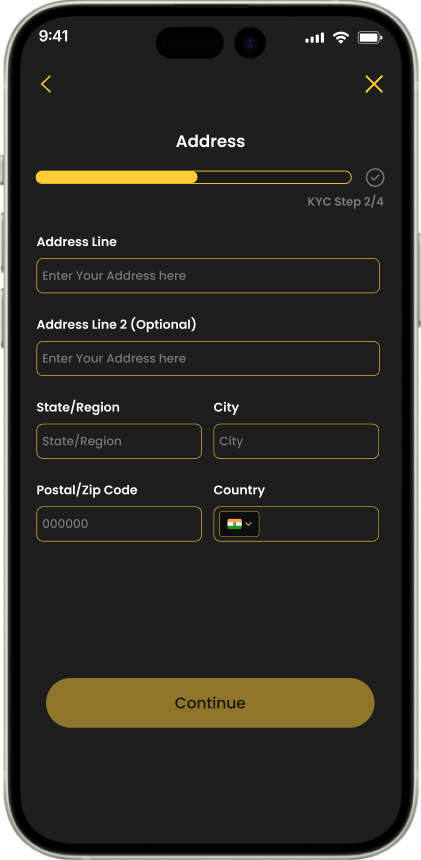
After the personal details are filled in, tap Continue. The next screen will be to enter your address,
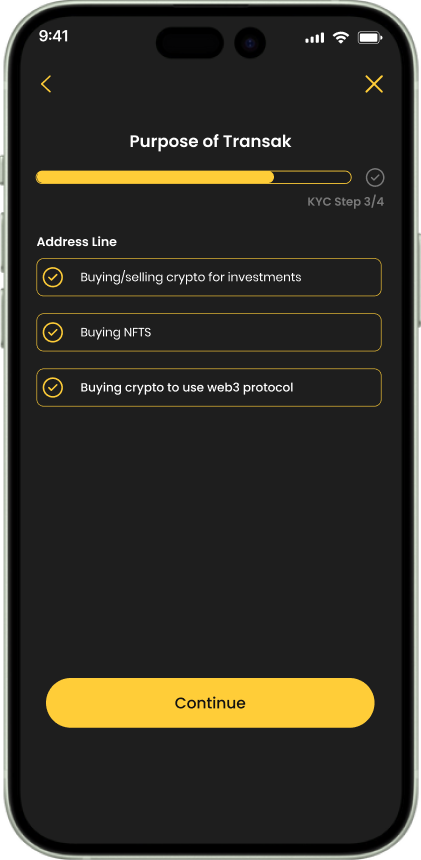
After you have entered your Address details, tap “Continue”. After you have tap the “Continue”, You will be asked the purpose for transaction as shown in the screen below.
After you have checked the choices as per your requirement, tap “Continue”.
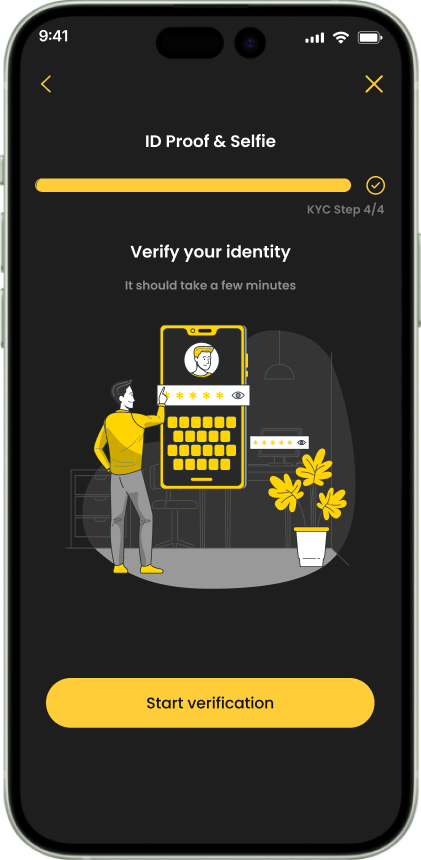
The next screen will be for verifying your identity as shown in the screen below.
Tap the “Start Verification” button.
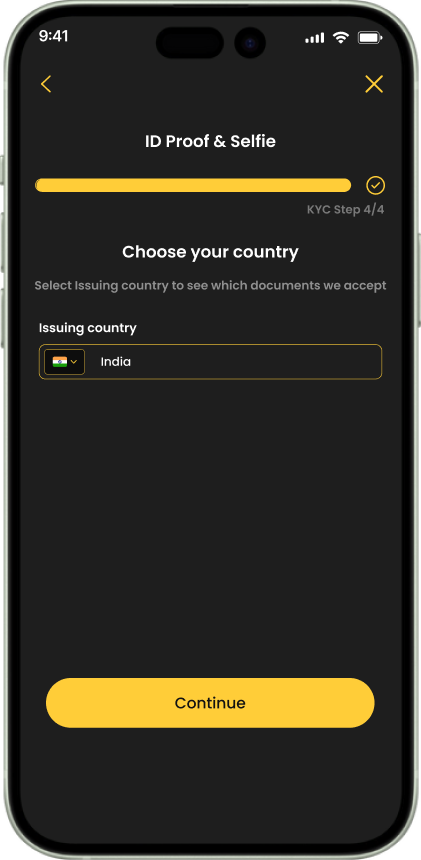
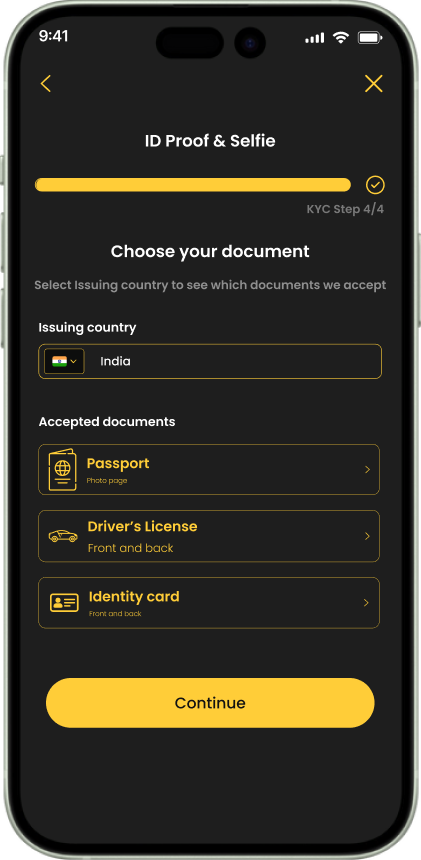
Next screen will be for choosing your document and for that you need to select your preferred country from which your verifying documents belong.
After you have selected your country, it will list down the list of the documents required for verifying in that particular country. Choose your document which is available with you and keep it handy as you will be required to scan the document.
After you have chosen your document from the given options, the next screen will be to Submit your Document page via camera of your device as shown in the image below.
Tap the “Take Photo” button to go to the next screen
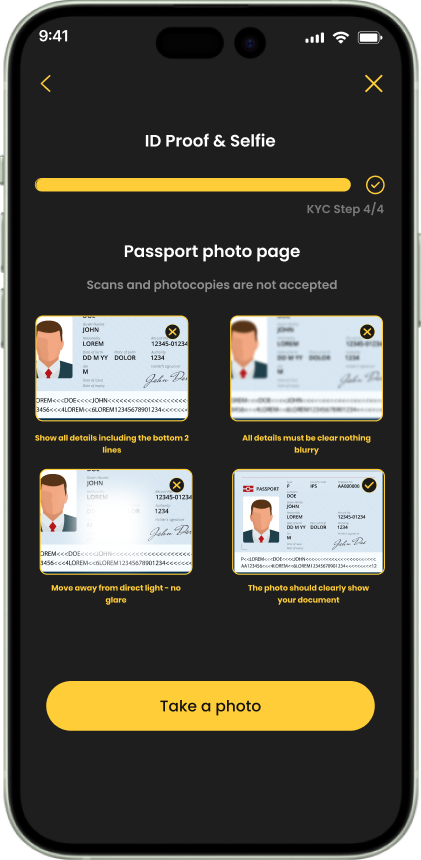
After you have tap “Take Photo” button, next screen will display how and which page pf your document is required to upload.
After you have kept your document ready and understood which page needs to be uploaded, tap the button “Take a Photo” button.
After you tap the “Take a Photo” button the next screen is of the device camera opened. Place your document properly in front of the camera and take the photo.
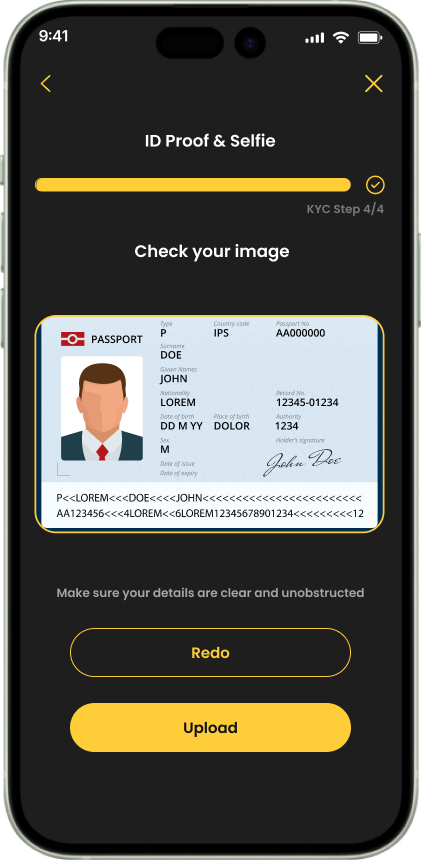
After you have clicked the photo tap the button “Upload”
After you have uploaded the photo the next screen will be to where you can complete the photo of your document upload process. If you think the photo is not clear enough, tap the “Redo” else tap “Use Photo” button and go to the next screen.
The next screen is to now take your selfie to confirm that the photo in your identification document belongs to you or matches with your Selfie. On the next screen, tap “ Continue”
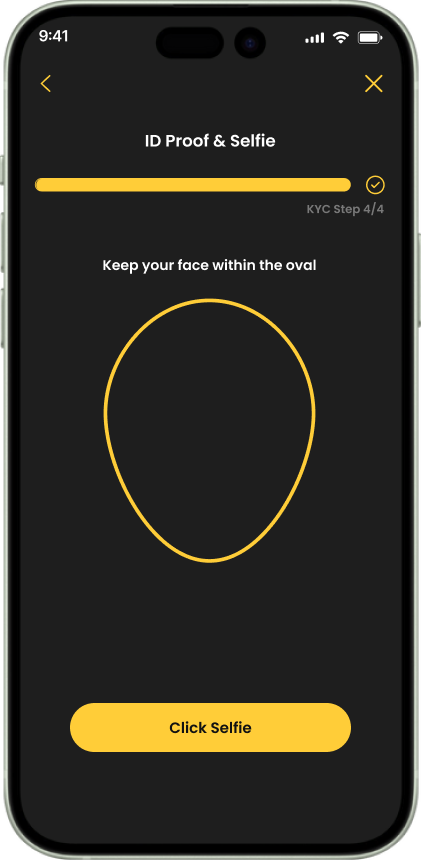
Once you tap the “Continue” button, the front camera of your device will open with an oval shaped frame. You have to place your fact within that oval shape area.
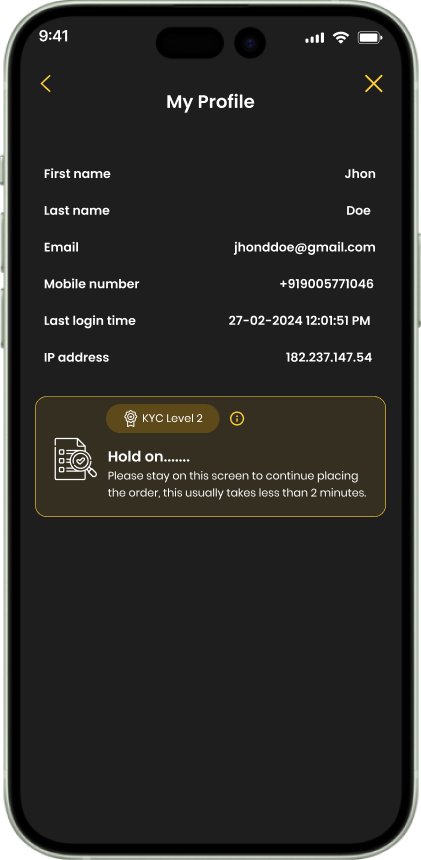
After you have take the selfie, tap “Upload” if you didn’t like the selfie, you can retake. After you are through all these process, Transak will ask you to wait for some minutes showing your entered profile as shown in the screen below.
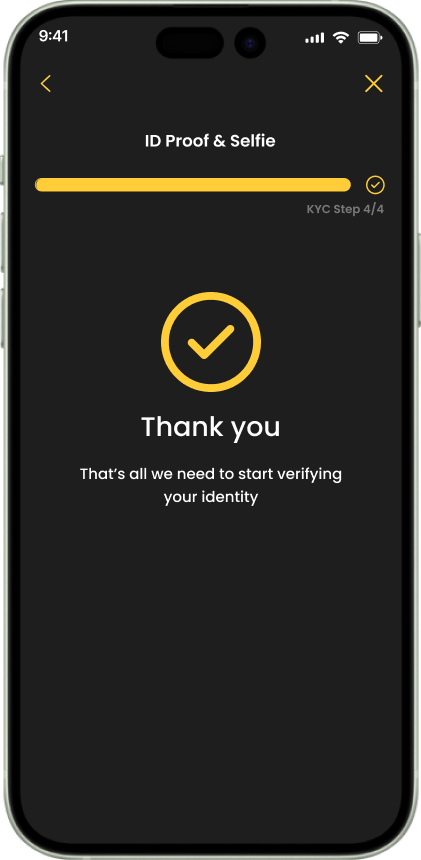
After all the process is done, a Thank you message will be displayed for you on the next screen as shown, and it will stay for few seconds and then the next screen shows up.
Congratulations as you are now set to go ahead with Selling your assets on our AXIR Wallet.
Now you tap on “Sell Now” button.
You will be asked to register your bank details as shown in the screen below
After you have entered the bank details, tap “Continue”.
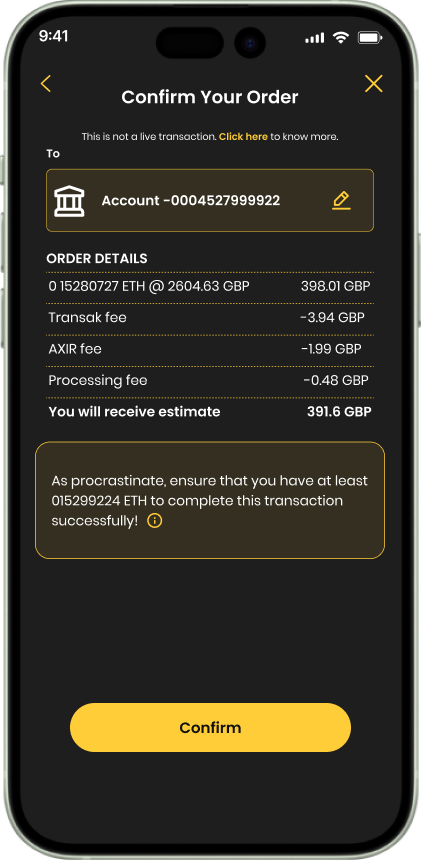
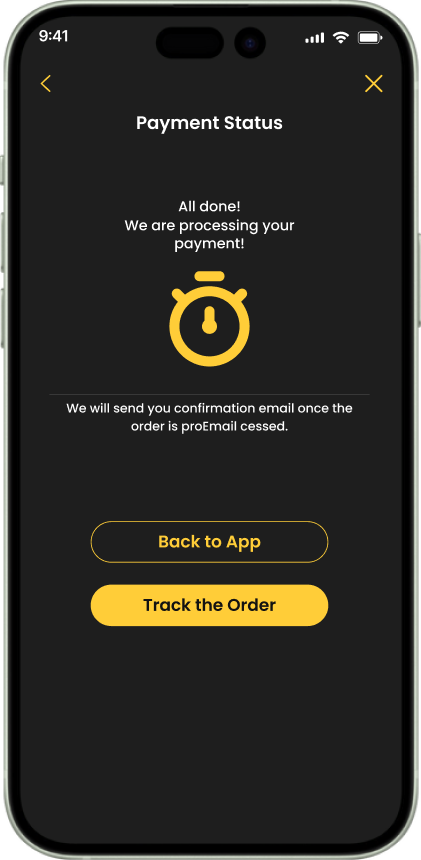
The next screen will show the processing transaction details. Tap “Continue”. The next screen will show you the processing of the order. There are 2- buttons as “Back to App” and “Track your Order” as shown in the screen below.
“Back to App” will take you to the initial screen after you tap “Sell” button from our app.
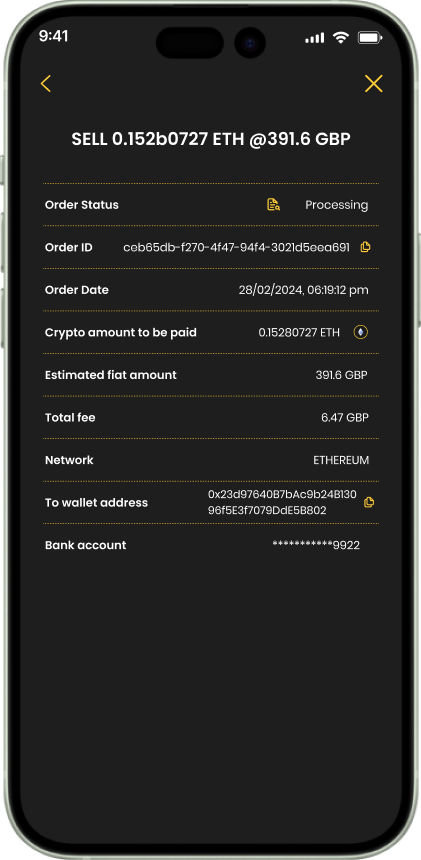
Tap on “Track Your order” it will show you the next below screen where it will show all the details of your transaction along with your entered bank details.